Setting up a simple Rails development environment with Docker for fun and profit

reating a development environment may seem like a trivial task for many developers. As time progresses, and we find ourselves dwelling through the life cycle of so many projects, one probably ends up with a fragile and cluttered development machine, filled with an entropic set of unmanageable services and library versions, ultimately getting to a point where things simply start to crack without any apparent reason.
With this small guide I hope to equip you with the set of tools and gears to create simple, manageable and isolated production-like development environments using Docker containers.
The Plan
For this specific example we will create a full contained Ruby on Rails development environment alongside with isolated common services it usually communicates with, namely: a PostgreSQL database, Sidekiq (and Redis to support it).
For creating and managing the isolated Linux containers we will use a combination of:
- Docker: the tool that will allow us to run lightweight isolated containers for our app
- Docker Compose: a tool that will help us manage multiple containers for the multiple services
As this guide presents itself with a more simplistic practical approach, and goes beyond explaining the intricacies of Docker itself, please refer to the Docker official documentation guides if you feel the need to get a grasp of more specific information on any of the tools presented above.
Entering Docker
We will then start by creating a container to run our code using Docker.
Even though the concept may seem analogous to a Virtual Machine (VM), a container does not fully virtualize the whole hardware and OS stack as a standard VM does. The container will include the application and its whole dependancies, running its processes on an isolated userspace, but sharing the host kernel with other containers. These containers can be looked upon as lightweight VMs (although they really aren’t) that provide a full virtual environment without the overhead that comes with booting up a separate kernel and simulating all the hardware.
To achieve this, Docker relies itself on both the Linux kernel and the Linux Containers (LXC) infrastructure.
Supervising the Supervisor
Not all operating systems actually support isolated userspaces. Linux supports them, but OSX and Windows don’t. So if you’re on OSX or Windows, we will have to use a virtualization solution after all in order to boot a kernel that does support them.
Historically this was achieved by spinning a VM on VirtualBox with a tiny Linux distribution on it to host the containers. Since last June, the Docker Team dropped VirtualBox leveraging both HyperKit, a lightweight macOS virtualization solution built on top of the native Hypervisor.framework (introduced on macOS 10.10), and for Windows it now uses the Microsoft Hyper-V solution.
For this particular example we will be working on a macOS machine so let us start by downloading:
- Docker for Mac : Docker for Mac is a native Mac application architected from scratch, with a native user interface and auto-update capability, deeply integrated with OS X native virtualization, Hypervisor Framework.
Creating a new Image
The way Docker images are managed is a bit like projects are managed via git on GitHub. There is a public collection of open source images at the Docker Hub where we can docker pull existent images or docker push our contributions and custom configurations.
After having Docker up and running on our machine we can now start writing the recipe that will instruct it to build our image and the contained environment we intend to be working with. This is achieved by creating a Dockerfile on the root of our project:
Let us then go to through this simple configuration. The first line simply states that we will base this environment on a lightweight Ruby image from the official Ruby repository named ruby:2.3-slim (you can actually check its own Dockerfile):
FROM ruby:2.3-slim
Next we have a run list to install all the dependencies we need to have a basic development environment. You need this because the ruby:2.3-slimimage is very minimal, and doesn’t contain them out of the box:
RUN apt-get update && apt-get install -qq -y — no-install-recommends build-essential nodejs libpq-dev git tzdata libxml2-dev libxslt-dev ssh && rm -rf /var/lib/apt/lists/*
- the build-essential package to have the GNU C compilers, GNU C Library, Make and standard Debian package building tools
- nodejs as our choice for a JavaScript runtime for the asset pipeline
- libpq-dev is the programmer’s interface to PostgreSQL
- tzdata as a dependancy for the Ruby Timezone Library
- libxml2-dev and libxslt-dev to build Nokogiri
- ssh and git as two essential tools for any sane developer
Busting up the apt cache and removing the contents of /var/lib/apt/lists helps us keep the image size down.
The next block sets our working directory on an environment variable and creates the folder that will accommodate our Rails app. The WORKDIRinstruction basically sets the working directory for any RUN, CMD, ENTRYPOINT, COPY and ADD instructions that follow it in the Dockerfile.
ENV APP_HOME /opt/fooapp
RUN mkdir -p $APP_HOME
WORKDIR $APP_HOME
Finally, as we will be vendoring our gems with Bundler on our vendor path /opt/fooapp/vendor/bundle we’ll finish by setting the required environment variables:
ENV GEM_HOME /opt/fooapp/vendor/bundle
ENV PATH $GEM_HOME/bin:$PATH
ENV BUNDLE_PATH $GEM_HOME
ENV BUNDLE_BIN $BUNDLE_PATH/bin
Now that our recipe is complete, it is time to test building the container. This can be done by simply running:
$ docker build -t samplefooappimage .
Afterwards we can confirm that, by listing all the available images, that it was in fact created:
$ docker imageREPOSITORY TAG IMAGE ID CREATED SIZE
samplefooappimage latest 8915a11cb4c6 12 minutes ago 484.7 MB
ruby 2.3-slim 68e02bf2b853 7 days ago 273.8 MB
Composing the Services Stack
Now the we have properly built our base image it is time to assemble and configure the services set that our application will be using. For this purpose we will be using Docker Compose, included on the installed Docker toolbelt. This tool will basically enable us to create and manage a multi-service, multi-container docker application.
We will start by creating an initial version of the configuration file with both our Rails app and PostgreSQL. On the root of our app, we edit a file nameddocker-compose.yml:
The configuration file is pretty straight forward. We are setting two service blocks. We will call database to the configuration to create and run PostgreSQL, and web for our Rails app. Please notice that Compose here will then create two separate Docker containers that will eventually communicate with each other, mimicking much more closely a real setup.
Let us now look a bit closer to each of the services’ configuration. For the database block:
- the
imagekeyword simply specifies the image that will be used to start building the container. In this specific case we will be using the official PostgreSQL image. - due to the volatile nature of Docker containers, we will need to persist the database data on our filesystem. To achieve that we are then specifying a mount point, from the host machine to the container, using the
volumeskeyword. - specify a filename containing a list of environment variables to be exported upon creation. For this example, the
env_filewill also be simple and contain the required PostgreSQL credentials info. We will then create it with some sample data:
For the Rails web service configuration is also pretty straightforward:
- create a link with the
databasenamed service container. Using thislinkskeyword will also make the linked service reachable using a hostname identical to service name, in this example:database - specify the Dockerfile path to
buildthe image - specify a mounting point for synchronising our app’s code between our host machine and the container
- expose, and map, the
3000port on both the host and the container - specify the default
commandto run after the container is started - we will reuse the same
.envfile in order to have, on this container, the same configuration variables to simplify the database configuration
Before we can start our two services we have to initialise the Rails app by installing the gems on the container and configuring the database. This will be the first command we will run directly inside the web service container:
$ docker-compose run --rm web bundle install
After installing the dependancies we should update the application’s config/database.yml with the database configuration information we’ve created on thedocker-compose.yml file:
On this plain configuration file I would like you to notice two things:
- the host is using the network alias we’ve specified on the compose link configuration
- we are using the environment variables exported from our
.envfile
Now it is just a matter of creating the database inside the container:
$ docker-compose run --rm web bundle exec rake db:create
And start both services (the optional-d flag runs the containers in a detached mode):
$ docker-compose up -d
You can check the state of your containers by running docker-compose ps and stop them eventually by running docker-compose stop :
$ docker-compose ps Name Command State Ports
— — — — — — — — — — — — — — — — — — — — — — — — — — — — — — — — — —
fooapp_database_1 postgres Up 5432/tcp
fooapp_web_1 bundle exec puma Up 0.0.0.0:3000->3000/tcp
If you are using OSX or Windows, the containers can also be managed by a tool called Kitematic (part of the Docker Toolbelt), if its installed, will also be available under the the Docker icon on the macOS’ menu bar:
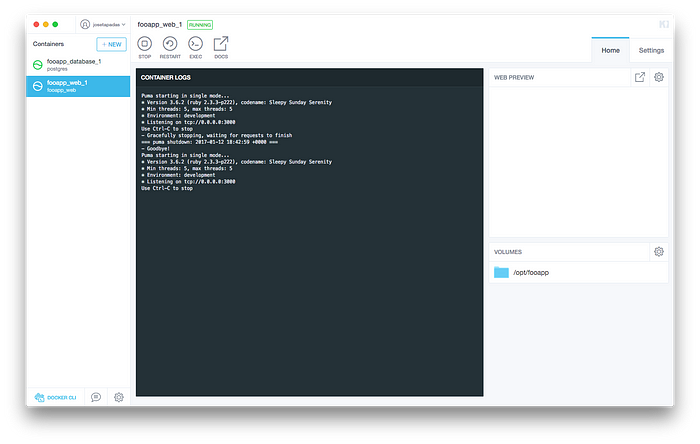
As puma is bound on the default route you can now easily access your app, outside the container, by navigating to http://127.0.0.1:3000 as expected.
Adding Sidekiq to the Mix
Let us now build up on thispreliminarystack by spinning a new container with our codebase but for running Sidekiq. Toaddnew services we simply re-use the same simple configurations on our composition file.
As it require Redis to work, we simply add it by editing editing our docker-compose.yml file:
As you can see it is pretty straight forward :
- we use an existent official Redis image
- we specify the port forwarding
- we specify a mounting point to persist the data at the host machine
- and we also link this new service to our rails app just in case
After running docker-compose up you will now see that the new container is going to be built and started.
Finally we simple add a new container specifically for Sidekiq:
As you can see from the updated composition file we now have a sidekiq service, linked to both our database and redis (with a host alias to avoid confusion). We are also sharing our .env file as we need to also update it in order to reference our REDIS_URL so Sidekiq knows how to connect to it:
Then we simple install the new app dependancies on the container directly, and restart our services:
$ docker-compose run --rm sidekiq bundle install
(...)
$ docker-compose restart
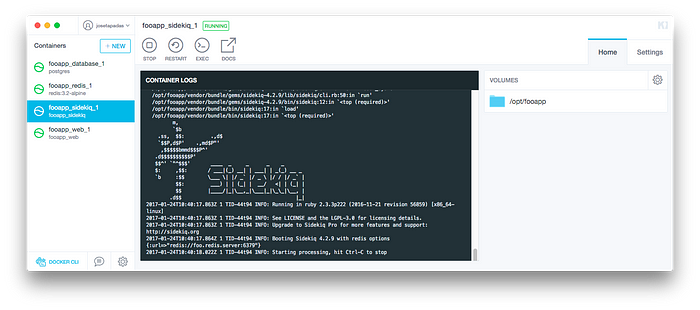
We will now see all services, with the new Sidekiq up and running:
Debugging tip with pry
To enable us to use a tool like pry on this stack we will need to add a way to attach to a running container and being able to write to stdin. To do so we will add the compose configuration, forttyandstdin_open, accordingly,
Enabling this will allow us to attach to any running container and interactively engage with its current running process, in this scenario, with a tool like pry.
Adding a simple binding.pry break-point on our app, we can access it by first, identifying what is the running container ID that we want to attach to:
$ docker ps
CONTAINER ID IMAGE COMMAND CREATED STATUS PORTS NAMES
(...)
7fba610d5c62 fooapp_web “bundle exec puma” 0.0.0.0:3000->3000/tcp
fooapp_web_1
(...)
And attaching to it:
$ docker attach 7fba610d5c62From: /opt/fooapp/app/views/static_pages/root.html.erb @ line 5 ActionView::CompiledTemplates#_app_views_static_pages_root_html_erb___2205918372626965601_36280540: 1: A new website.
2:
3: This is not a new feature :)
4:
=> 5: <% binding.pry %>[1] pry(#<#<Class:0x00000004531cf0>>)>
From here you can engage with the breakpoint as you would do on your common development workflow.
Wrap up
Even though this is a very minimalistic set up, it does comprise a contained, multi services application foundation that serves itself as the basis for many of the projects you may end up working at. This setup also has the bonus of actually mimicking the machine structure of a multi-service application.
The simplistic approach of using this configuration files will not only keep your development workflow sane, if you are working on multiple projects with a diverse dependancies ecosystem, but will also dramatically ease the entry curve for any newcomers to virtually any project you have set up.
Please feel free to reference and contribute to the Dockerfile and Docker Compose configuration files used in this example.
Further reading
- https://docs.docker.com/engine/understanding-docker/ : Understanding Docker, from the official documentation
- https://docs.docker.com/compose/reference/ : Docker Compose command reference
- http://docker-sync.io/ : enables a performance boost on OSX users by using either rsync or unison to sync the volumes between the host machine and the containers